Head Office
Markham, ON L3R 0H5, Canada
Access Path
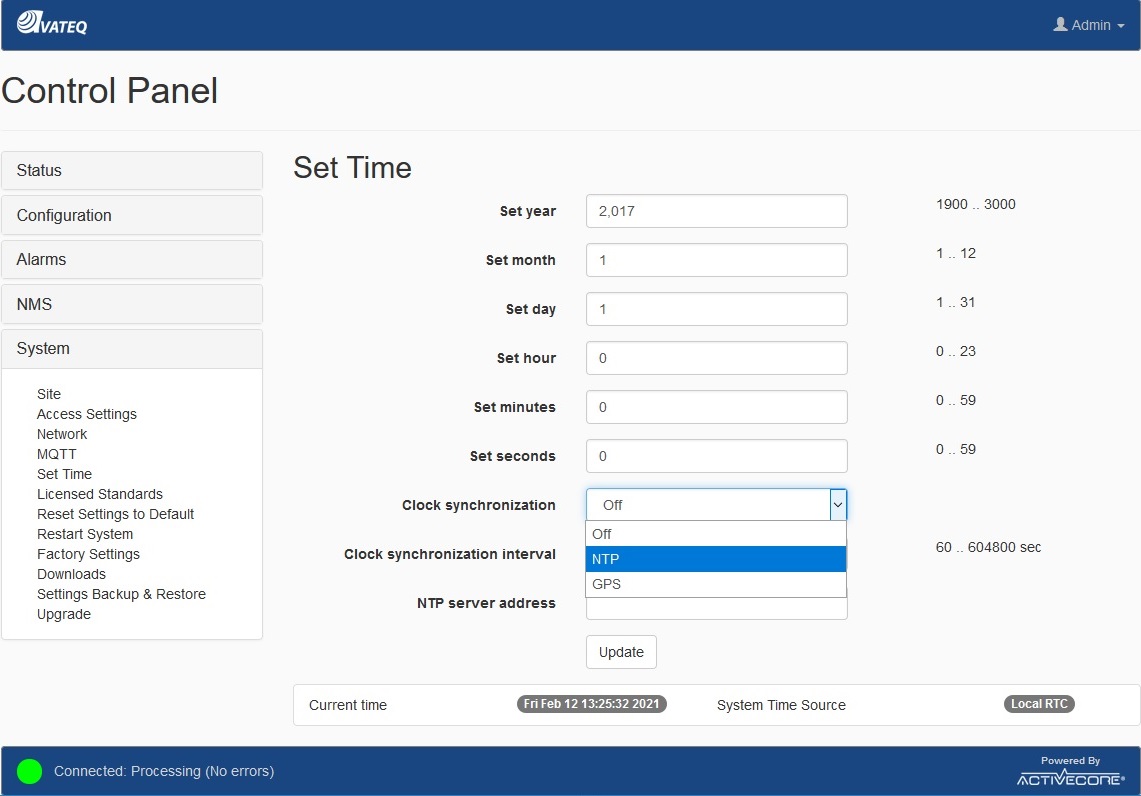
Control Panel > Configuration > Set Time
Screenshot

Figure 1 - Time and Synchronization Settings

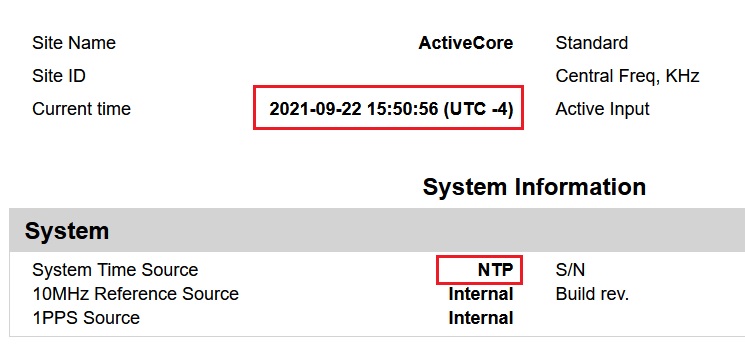
Figure 2 - Reporting NTP-synchronized timestamp

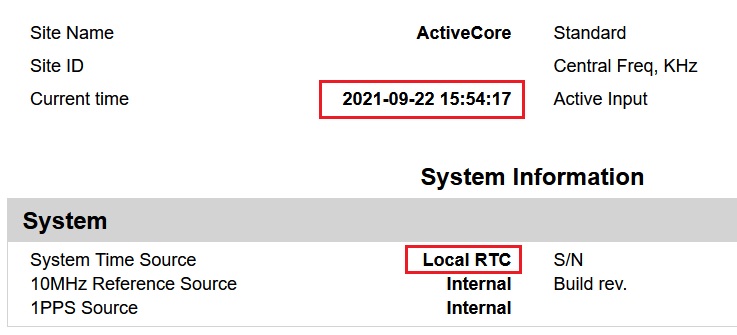
Figure 3 - Reporting non-synchronized timestamp
Description
| Field | Values | Default | Description |
|---|---|---|---|
| Set year | 1900 - 3000 | 2017 | Manually set year for the internal RTC |
| Set month | 1 - 12 | 1 | Manually set month for the internal RTC |
| Set day | 1 - 31 | 1 | Manually set day for the internal RTC |
| Set hour | 0 - 23 | 0 | Manually set hour for the internal RTC |
| Set minutes | 0 - 59 | 0 | Manually set minutes for the internal RTC |
| Set seconds | 0 - 59 | 0 | Manually set seconds for the internal RTC |
| Clock synchronization | Off NTP | Off | Time synchronization options. |
| Clock synchronization interval | 60 - 604800 | 60 | An interval to load and adjust internal RTC with NTP server. |
| NTP server address | NTP server address as an IP address or domain name | ||
| Update | Apply new settings. |
The Receiver can use several sources of time for internal events, alarms, and log record stamping. Depending on the user’s application the Receiver can use its internal RTC (Real Time Clock) engine or an external source with NTP capabilities.
The Receiver internal RTC can be manually set by entering new values in correspondent fields - Set year, Set month, etc.
If NTP-based synchronization is enabled, the Receiver will be trying to connect to the NTP server in specified intervals. The current status of the NTP synchronization is reported in the Status line on the Receiver UI Main Page:

.
Note: GPS is optional and available for AVQ1022 (1st Gen and Satellite) models only. For successful GPS-based synchronization, 3D Fix is required.
Note: Timestamp at the header section of the Report is based on the synchronization status of the unit - see Figure 2 and Figure 3 for reference
